
How to enable Secure Boot on PC to install Windows 11
How to enable Secure Boot on PC to install Windows 11
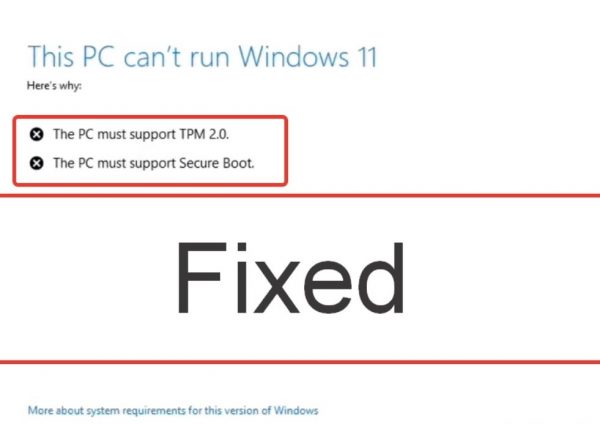
Check if you are looking “How to enable Secure Boot on PC to install Windows 11” or If Windows 11 requires Secure Boot to run, and here are the detailed steps to check and activate the security feature on your PC. In addition to a TPM, your PCs also need to have Secure Boot enabled to upgrade to the latest Windows 11.
Secure Boot is a security feature; it is in-built on most PC with UEFI firmware and modern hardware. It gives us a secure environment to start Windows and prevents malware from hacking and hijacking the system during the boot process. In simple words, Secure Boot allows the devices to boot with only trusted software from the OEM.
The advantage of this feature is a more secure experience; that’s why Microsoft is making it required to install Windows 11. However, there is a caveat: Enabling this option prevents you from running other operating systems, such as Linux.
This Windows 11 guide can help you through the steps by step to check and enable Secure Boot to upgrade Windows 10 PCs.
- How to check Secure Boot state on Windows10
- How to enable Secure Boot on Windows10
- How to enable Secure Boot during startup
How to check Secure Boot state on Windows10
To check whether Secure Boot is activated, use the given steps:
- Click on Start.
- Search for System Information and click the available result to open the app.
- Click on the System Summary on the left side.
- Check the “Secure Boot State” information. If it reads On, it is enabled. If it reads Off, it is disabled or not available.
- Check the “BIOS Mode” information. If it is reading UEFI, you can enable Secure Boot. If it is reading Legacy (BIOS), you can enable the feature, requiring additional steps.

Once you have complete the above steps, if the BIOS Mode is UEFI and the feature is disabled, then start using the steps outlined below to enable a more secure experience running on Windows 11.
Also Read
Fix Windows 11 TPM 2.0 Chip Module Error Motherboard
How to check if your PC can run Windows 11
Windows 11 arriving free upgrade officially on 5th october by Microsoft
If the “Secure Boot State” is turned to Off and “BIOS Mode” to Legacy, then take a backup of your computer, start using the given instructions to convert the installation from MBR to GPT, and then continue with the given steps below to enable Secure Boot.
How to enable Secure Boot on Windows10
To enable the Secure Boot on a PC with UEFI, use the given steps:
Note: Changing the wrong firmware settings can prevent your device from starting properly. You have to access the motherboard settings only when you have a good reason. It is assumed that you know what you’re doing.

- Open the Settings.
- Tap on Update & Security.
- Click on the Recovery.
- On the “Advanced startup” section, click the Restart now button.
- Click on Troubleshoot.
- Then click on Advanced options.
- Click the UEFI Firmware settings option. (A quick tip: The option will not be available If you have a legacy BIOS)
- Now click on the Restart button.
- Open the boot or security settings page.
- Select and click Enter on the Secure Boot option.
- Select the Enabled and press Enter.
- Exit from the UEFI settings.
- Confirm the changes to restart your PC.

If you have done the steps, then the security feature will enable, and the PC should now comply with the requirement of Windows 11.
Enable Secure Boot during startup (Windows 11).
Although, instead of using the Settings app, you can also enable Secure Boot by booting into the UEFI firmware during startup.
To access the system firmware during the boot process, use the given steps:
- Press Power button.
- See if the screen splash to identify the key, you must press to enter the firmware (optional).
- Press the required keys repeatedly until you enter into the setup mode. Typically, you need to press the buttons Esc, Delete, or Function keys accordingly (F1, F2, F10, etc.).
- Open the security or boot settings page (as required).
- Select the Secure Boot option and Enter.
- Select the Enabled option and Enter.
- Exit from the UEFI settings.
- Confirm the changes to restart the PC.
Once you have complete all the steps, Now Secure Boot will support the installation of Windows 11.
If you can’t access the firmware using the keyboard, you may be required to check your manufacturer documentation to determine the key you have to press during Boot. Here are some brands are given below with their respective keys to access the system firmware:
- Dell: Press F2 or F12.
- HP: PressEsc or F10.
- Acer: Press F2 or Delete.
- ASUS: Press F2 or Delete.
- Lenovo: Press F1 or F2.
- Toshiba: Press F2.
- Samsung: Press F2.
- Surface: Press andHold the volume up button.
Note: Microsoft is not fully enforcing all the system requirements during the development process. However, this may be changed when the final version is released. (“How to enable Secure Boot on PC to install Windows 11“)
Note: If you find any wrong information in specs and price, kindly inform us in the comment box.
Stay tuned for more information about How to enable Secure Boot on PC to install Windows 11. Please don’t forget to like or follows us on our Twitter, Facebook page, and Instagram accounts.

- Mytechgallery
- Warzone 2 Best Graphics Settings on PlayStation, PC and Xbox November 25, 2022
- How to Update Office 365 in Windows 11/10 November 23, 2022
- How to solve the Vanaheim Crane Puzzle in God of War Ragnarok November 21, 2022
- How to remove Background from a Photo in iPhone running iOS 16 October 30, 2022
- How to beat the Ginormous Goomba in Mario + Rabbids: Sparks of Hope October 29, 2022